DUE TO ISSUES WITH GOOGLE PHOTOS ALL IMAGES AFTER AUGUST 2015 ARE NOT SHOWING, I AM TRYING TO FIGURE OUT HOW TO GET THIS WORKING!

Friday, January 25, 2013

Upgraded network. Rack and Patch panel installation.

Whoever ran the wiring in this office did us a major favor. They had run CAT5 wires home run for each voice run. Each desk had 3 CAT5 wires run to it. 1 was for DATA, and the other 2 were for Voice.

We needed to add 3 CAT5 jacks to each desk, and eliminate the voice jacks completely, since they were converting over to VoIP. Each desk has 2 VoIP phones and a computer. We wanted each phone and computer to have its own individual jack, and to provide power to the phones with a PoE switch.

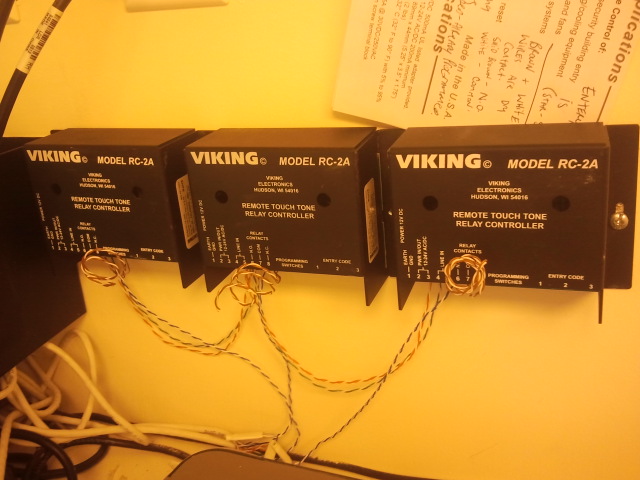
This is what their network looked like when we got started.  

I converted all of the old analog jacks over to data jacks. All of the wiring was home run, and was all CAT5, so this meant nothing more than just replacing the jacks at the end of the wires, and connecting it to a patch panel.

I installed a rack, added a 2nd patch panel. Put in a shelf in the new rack, and connected up all of the network equipment.

The completed product.
The customer is more than happy with the end result, and has even took additional photos of his new network and emailed them to my boss. I however would have liked to have cleaned up the blue CAT5 wires a little better. The blue CAT5 wires are the data jacks for the computers, for their existing network. 

But this was all done with minimal down time for their network. There were several hiccups where the network was inadvertently disconnected for several seconds due to the previous mess that had to be organized, but all in all everything is up and running solid now. 

A dual WAN router was installed, providing internet from FiOS as well as a cable modem. The phones are running on the cable modem, while the PCs are running on the FiOS - with auto fail over, so if one internet goes down, the other will pick up the slack for phones and PCs. 

A PoE switch was installed for the VoIP phones.

Due to the customers request, this is not a standard 18 inch deep rack, it is a 12 inch deep rack. The customer did not want a rack that stuck out past the furniture below it, because he may want to install a cabinet or place furniture beside it to conceal it better, but with such a beautiful network he may want to show it off now.  

2 enforcer wireless receiver installation

Newly installed 4 channel enforcer wireless receiver and 1 channel receiver.

These wireless relays are used for door "buzzers"

a 4 channel FOB keychain is also shown in the image.

The network room has a metal ceiling, and there are 2 brick walls that the signal needs to pass to get to the front door, so an external antenna needed to be installed and mounted to get the signal to reach to the front door. Pulling a new wire and installing the single channel relay closer to the front door was NOT an option, because the building owner had a problem last time we tried pulling cable thru the common hallway of the building, not to mention, this is the location with the sheetrock ceilings, so it would have taken a day or 2 to even get that wire run.


60 wire network rack + patch pannel

UPDATE: [CLICK HERE] to see completed network including modem, router, switches and patch cords.

Newly completed Installation of aprox. 60 CAT5 runs, rack and patch panels.

All wiring punched down in panel. 

Completed Patch panel. 

Wiring entering patch panel from ceiling above. 

wall mount router and modem + surface mount CAT5

Wall mounted cable modem and customers router.
Hanging wires are temporary for old VoIP phone on desk above.

Newly installed CAT 5 wiring running along electrical conduit
and baseboard. 

3 door phone relays installed


3 Door relay install. 

The customer had everything "prewired" but I guess their low voltage wiring guy forgot to wire the door jams with a wire for the door release latch. I installed 3 relays, that connect to the dial tones on their Cisco Router/ATA device and installed an e20B door phone at each door. 

I left the coil of wire for the relay so that whoever was going to wire the door frames could just connect to that coil of wire. Everything has been pre-programmed for them so that they just need to run their wires and connect the door release latch. 

Snaking thru Sheetrock for camera wires.

Installing wires thru drop ceilings is an everyday thing. It is quite easy when you can move a ceiling tile and get up inside the ceiling. Sometimes things are not that easy, and everything is sheetrocked over. What to do then.

Well the first thing you do is hope that the sheetrock ceiling is dropped so that you can not only go across from side to side, but also front to back. If the sheetrock is up on the beams then there will be a lot of work ahead cutting out all kinds of holes.

Luckily in this installation the sheetrock was not on the beams, but instead dropped down. The best situation for when there is no ceiling tiles to move out of the way. Holes still need to be made, but they can be done so at a minimum.

In the foreground of the image you can see a  square hole that had to be cut
so that I could fit my hand in and fish the wire to make a turn.
Several other smaller holes were made with a hole saw where wires needed to  run.

There is a crawl space above this ceiling, so all that was needed here
is the small hole saw hole below the exit sign (barely noticeable) 

This is the opposite wall from the image above, and just outside
the door where the square hole was made (2 photos above)
This brings the wire into this room, and over the ceiling in here.
The reason it could not be brought in above the ceiling in this room
is because the ceiling heights differ, AND this is a brick wall,
the wall by the "EXIT" sign is also a brick wall.

Another larger square hole had to be made to get around
ductwork inside the ceiling. 

To get from the 2nd floor to the 1st Floor a small
hole saw was used to get inside the walls. 

Unfortunately the first hole came right behind a beam, so a second
had to be made to get the wall up in the ceiling of the 2nd floor.

The wired up power supply. 

Most of the cameras installed. 
In cases like this, you want to keep the damage to a minimum. I advised the customer ahead of time that damage would need to be done to the walls so that the wires could be run. I advised them that it was not our responsibility to repair that damage. I used a hole saw for most of the holes to keep the openings consistent, so that it would be easier to repair. It was also faster to make openings in the wall with a drill and holesaw, rather than use a sheetrock saw and have inconstant sized holes. Some holes did need to be opened with a saw, but I believe there was only 2 or 3 that needed to be opened that much. 

The customers existing DVR was only an 8 channel. and the admin password was locked, so we could not gain access to make changes to that system. The initial thought was to replace it with a 16 channel DVR, but the customer wanted to keep costs to a minimal. So we installed another (cheaper) 8 channel DVR from the same manufacturer so that they could use the same software on their computer to view cameras from both DVRs at the same time. This did increase the cost of the DVR compared to what a budget DVR would have cost, but the benefit is that the customer can access all camera feeds from a single piece of software on their desktop with out needing to switch between windows.

Relays + multi channel power supply install

This is the Multi channel power supply and relays that I have installed in my employers office.

DC power supply,
providing power for the cameras
and relays. 

Relays, power supply, and ATA

SPA 112 on top, provides dial tone for door phones.
RC2-A Relay activates door latches from DTMF
Enforcer 4 channel wireless receiver for FOB keychains 
Cisco / Linksys recently replaced the SPA 2102 and PAP2 devices with the SPA 112 devices. Installed is an SPA 112 which provides dial tone and a hot dial for the door phones. The dial tone from this device goes into the RC2A relay just below, and then to the E20B door phone (not shown). 

The RC2A is a DTMF activated relay. When someone presses the button on the E20B door phone the SPA 112 will hotdial the extension group for whatever phones are in the door phone hunt group. When someone answers the phone, they can then dial the programmable code that is set on the RC2A relay to activate the relay and "buzz" the door from their phone.

The Enforcer 4 channel wireless receiver is a wireless 4 channel relay that you can use with programmable keychains to activate a relay. In this application it is connected to door latches to "buzz" the doors open with a FOB keychain, similar to one used for a car alarm.

Since this image was taken an additional wireless receiver was installed to control the roll down gates so that the gate could be opened and closed with the push of a button.

Abandon ATF / law enforcement network closet.

Found this network room rather interesting. One of my customers moved into an office where the ATF and other government law enforcement agencies once occupied. The racks and most of the network equipment was ripped out, but there was still some T1 boxes and various wiring that was labeled with different law enforcement agencies.

This network room is now the network room for my customer. Any markings or labeling from any law enforcement agency was left there from when those agencies occupied this office space. To the best of my knowledge there is nothing in these images that would compromise any investigations these agencies may have had, or will have in the past or future. I believe that since this is how the office was left after they moved out from this office, that they have taken all precautions to safeguard any sensitive information, and I believe that posting these images are within my legal rights.

Bla, bla, bla, normally I only post images of networks that I have worked on, but I found this rather interesting. How often do you get to work in a network that was previously used for law enforcement. I apologize for my paranoid disclaimer above, but would rather be cautious than anything else. 

I did not remove anything from this location, nor are there any other images of this network that are not posted below.