DUE TO ISSUES WITH GOOGLE PHOTOS ALL IMAGES AFTER AUGUST 2015 ARE NOT SHOWING, I AM TRYING TO FIGURE OUT HOW TO GET THIS WORKING!

Thursday, April 10, 2014

Doorphone + 1 wire run + switch

Recently I went down to a customer to install a few IP phones and a doorbell. Most of the time for customers that we do not do the wiring for the door bell is already wired up, sometimes with a door strike, sometimes without. 

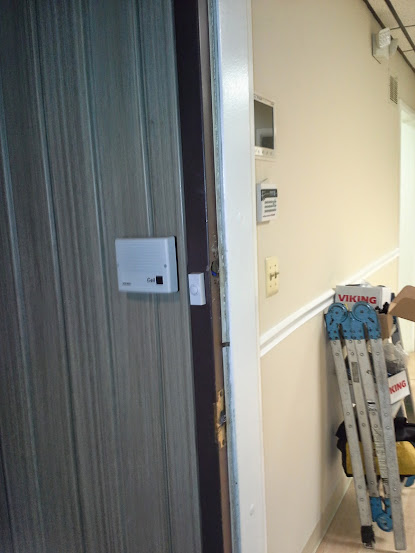
Viking E-20B installed
This customer recently moved into the office and had someone else install all new network wiring, however this person did not prewire for the doorphone, so I had to run a wire to the basement from the door, however drilling straight down from the door frame to the basement was not possible due to the fact that the door was beyond the basement wall, over the poured concrete foundation walls. 

I brought my wire down into the door frame from my relay in the basement
so the locksmith can connect once he cuts out the door frame
and installs the latch. 
The walls the doorphone was installed was also solid, so I was unable to snake it up into the drop ceiling, so I installed a wiremold in the corner, that is barely visible as it blends into the white woodwork so well. 

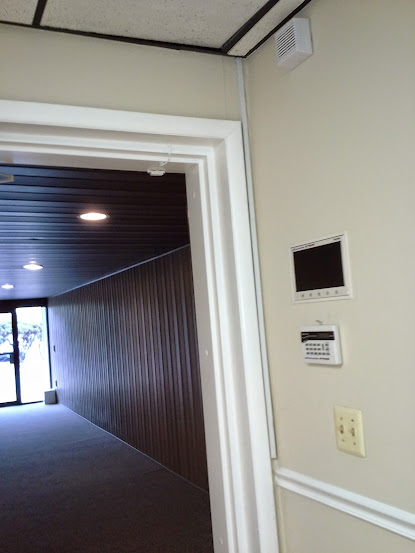
The wiremolding in the corner is barely visible
as it blends in with the white woodwork.

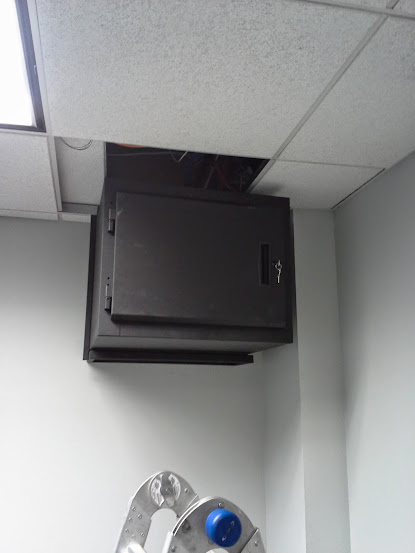
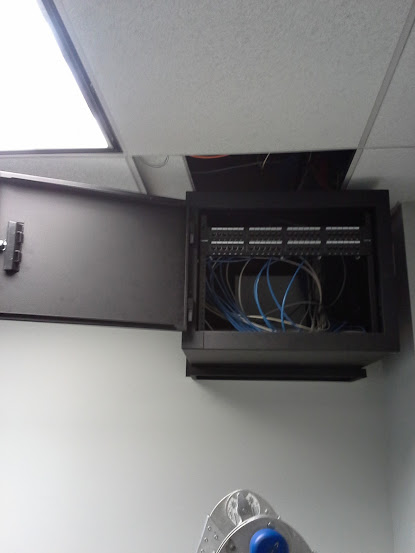
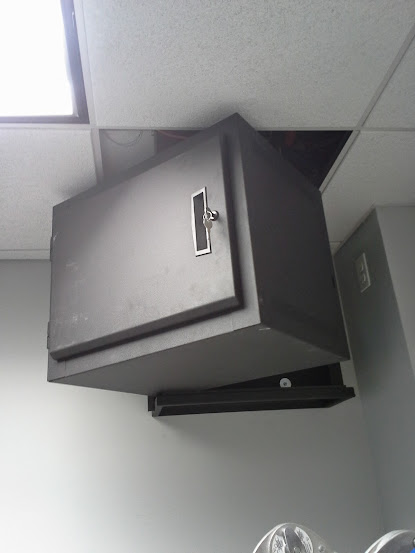
The wires were then snaked across the drop ceiling into a closet where the wiring for the DVR ran down to the basement to the patch panel. 

This is why you should install a rack!
Whoever installed the switches should have at least mounted them on the wall.
Why a rack was not installed by the guy who ran the CAT5 cabling I don't know. The permanent CAT5 wiring was done neatly and professionally, however in front of the patch panel was a folding table where a server was installed, as well as the switches and routers.

The equipment I installed (except the existing 66 block)
SPA2102 for doorphone phone line
8 port TP link switch
Viking RC2A relay
Wire is tagged for locksmith to connect power supply for door latch.
Despite the mess that the guy who patched the switches and routers for the computer network, I still made sure to mount my ATA, relay and switch as neatly as possible onto the plywood wall. 

Installing 6 IP phones, running 1 CAT5 from 1st floor down to the basement, mounting and installing all of the other hardware took about 3 hours for me to complete, including time to show the customer how to use their new phones.

The only thing left to do now is have the locksmith cut out the frame and install the door latch as well as a power supply in the basement on the wire that I labeled for him. 


Saturday, April 5, 2014

New network with enclosed rack

Currently we are working on installing a network for a customer who wanted a fully enclosed rack, because it is going to be in the main office space area. The CAT 5 wiring was already in place, but the panel had been removed, and the wires were just rolled up in the drop ceiling.

Aside from installing the enclosed rack and 48 port patch panel he wanted us to replace all of the existing jacks and faceplates. We color coded each jack White on top and Blue on bottom. Within this office, there is also a large room that will be used by a different tenant that is sharing office space with them. That network and its CAT5 wiring was not in place yet. When I installed that network I installed Red and Green jacks on that network to distinguish it from this network, but I still left 2 jacks from this network next to the panel for the shared office space network for the future. (If the office ends up belonging to a single tenant, or if one of the tenants internet connections goes down they can "borrow" the neighbor's internet connection, share a printer, or analog phone line.)

Enclosed rack mounted completely closed.
Front door open in the rack.
(wiring has been punched down but not completed yet)
The front door of the rack is easily removable!
The entire rack can swing open for easy access to the back of the rack,
for power managment, or any other access requirements to the rear equipment
Door removed and entire rack swung open.

Another patch panel will be installed, probably in the back portion of the rack for the IP cameras and door phone. 

All patch cords will be color coordinated with the color of the jacks. 

In the 48 port panel the top row = the top jacks (white) and the bottom row = the bottom jacks (blue)  

more to come....

And here it is - the final patched in product.
The customer wanted the patch cords to match the jack colors, so blue and white patch cords were used. 
A co-worker of mine completed the patching in of the panel and switches. 


Due to space restraints with the door of the panel closed, we could not make the patching any neater than it appears in the images.


A 24 port switch and a 16 (a ports PoE) switch was installed and mounted.

The top panel is for the (white) voice (VoIP) and (blue) data jacks.
The bottom panel is for the IP cameras. 

Sunday, March 9, 2014

Installing hidden network and fixing wires cut by contractor!

We recently ran about 15 CAT5 runs for a newly renovated supermarket. Unfortunately the guys installing the sheetrock cut every single wire!! It was too far into the construction phase to replace these wires, since the wires going down the wall had the sheetrock laminated over them, and most of the rest of the walls had already been finished. The only solution was to splice every single wire. It took about 4 hours, and it is not recommended at all, but I was able to splice all of the wires together in the ceiling, after cutting open a huge opening in the ceiling to get better access to my wiring. 

Fixing the contractors damage to EVERY SINGLE wire we installed!
I advised my boss, as well as the customer that this is not the right way to go about this, and that I could no longer guarantee the effectiveness of any of these wires, but we were left with little choice. Luckily when all was said and done only a SINGLE PAIR of wires failed. Unfortunately the device connected to this wire that had the failed pair was a PoE device, but with a little trickery  we were able to get that device powered up and working with just 3 out of the 4 pairs in the CAT5. 

Hiding the patch panel under a shelf by the register.
The original plan called for a lockbox to be placed on the bottom shelf by the register to house the patch panel and switch, however upon our return to punch down all of the wiring the register cabinet had been changed, and lacked the depth required to mount the hardware. Fourtunately there was plenty of space under the shelf unit to place everything hidden out of plain sight. 

Installing shelf back over hidden patch panel. 
This placement of the network is probably even a better option then the original plan with the lockbox.
It provides better airflow around the entire 24 port PoE switch that has been installed (since photos have been taken) and keeps it hidden out of sight, so someone attempting to disrupt the network will have difficulty locating it.
Shelf in place, no one will ever know the network is hidden below! 


Monday, February 3, 2014

Choose your business email address carefully.

Recently I have noticed several companies where they are using an @verizon.net or other ISP provided email address for their business. This is the absolute worse choice that you can make when choosing an email address to provide to the public for your business.

I have already had several customers who learned of this first hand, when they moved or changed internet service providers and were unable to take their "business" email address with them.

Unless you work for the ISP, using their domain's email address is NEVER a good idea for your business email.

So what should you do in deciding on your business email address to provide to the public, because you ARE going to need an email address. The fastest, easiest, and free way to go about this would be to get a gmail address such as yourbusinessname@gmail.com. This is NOT the most professional looking, and probably should only be done for businesses that do not yet have an online presence, but its portability for when you move locations or internet providers it is better than using your ISPs provided email address.

Using a free email service such as gmail however does not present the most professional of appearances however, and may make more tech savvy customers skeptical of doing business with you, at least via email. The reason is because anyone can easily set up a free @gmail address and use whatever name that was available. Gmail addresses for business uses should only be used in the start-up phase of your business, or if you rarely communicate with your customers via email.

The best choice for email for your business would be to use your own domain such as yourname@yourcompany.com This provides the most professional appearance to the public, and provides the most legitimacy. Hosting your own email server is probably not the best option for the average business, but fear not you can go to google or many other companies to host your email out on the cloud.