DUE TO ISSUES WITH GOOGLE PHOTOS ALL IMAGES AFTER AUGUST 2015 ARE NOT SHOWING, I AM TRYING TO FIGURE OUT HOW TO GET THIS WORKING!

Friday, June 21, 2013

"small" 11 jack network.

Basement and 1st floor 11 new wires and jacks needed to be installed. Surprisingly fast. Had wires installed, and hardware installed (router, switch and 12 IP phones) within 2 days from start to finish. The shortcut? I did not test or label any of the jacks, which would have taken at least an extra few hours.

Patch panel, 16 port PoE switch and linksys E2500 installed by me,
everything else existed prior.

Saturday, June 15, 2013

double network 12 runs each with patch panel and rack.


Let's try something different this time. I took a bunch of photos for this network. I am going to start with the final product and work my way backwards this time...

Closeup of the finished rack.
The camera was crooked not the rack!

Each location has a total of 2 jacks each. One for the VoIP network, and one for the PC data network. An 8U rack was installed, and 2-24 port patch panels were installed. I also ran an RG6 from the cable tap in the hallway to the rack so that the cable modem could easily be installed when ready. 

Completed rack, finally!
This job was given to me, like all other jobs - with incomplete, or inaccurate information. I was told that this was a job for "5 double runs" or a total of about "15 runs". Either someone does not know math (5x2=10, not 15) or they were just guestimating what the customer needed based solely on information provided by the customer over the phone or email, and not surveying the job, or the requirements of the customer.

Rack mounted, patch panels all punched down ready to be installed.
The first day I arrived on site to survey and begin work I was severely lacking enough materials to complete the job, but I was able to get "5 double runs" from where my rack was going to be mounted, and down the walls at the desk locations.  

Rack all assembled, and toggle bolts connected,
ready to be mounted to the wall.

After finding out what time my supplier closed, and phoning in an order it was time to depart. I had exhausted the materials that I had brought with me, and it was a long trip back to the supplier before they closed. 

Both patch panels punched in.
After 2 local service calls in the morning, it was back to finish up the wiring. I had all the materials and was ready to go. All wires were finally able to get pulled from the location where I decided to place the rack and snaked down the walls. Unfortunately due to the service calls in the morning, this meant that I only had half-day, but was at least able to pull all the cables down the walls.

Wires brought down wall behind where rack will be installed.
VoIP and PC network wiring separated.
Day 3 I was able to get the all of the wires punched down, all of the face plates installed, and all the jacks labeled and tested. Unfortunately after labeling the first jack my label machine started smoking and no longer would function, so all other jacks had to be hand labeled with a marker. I also was able to get the wires run down the wall behind my rack location, install the RG6 wire for the cable modem, and run a CAT5 loop for additional door phones, which unfortunately the model that the customer currently has is discontinued, so no hardware could be installed.

Wires snaked inside wall behind rack's location. 
With EVERYTHING completed it was time to mount the rack. But, guess what? The box that I had brought from inventory that was in the box that an 8u rack comes in was not a rack! Someone had reused the box, and taped it up, so when I opened the tape to get to my rack, it was an old piece of networking equipment  and not a rack. 

Yes that wood beam is as deep as it looks, it has to be at least 4 or 5 inches thick!
With nothing left to do, I called the supply house once again, and put in an order for a rack, since I knew I would be arriving there just as they were closing. I was able to get the rack, and jump start my day with an hour long drive for the 15 minute task of mounting the rack to the wall! 

Old phone from old tenant.
Many of the old low voltage brackets were used for my jacks,
and many of the old wires were used to snake my wire down the walls. 
Finally, after 2 half days, 1 full day, and 15 minutes the job was finally completed! 
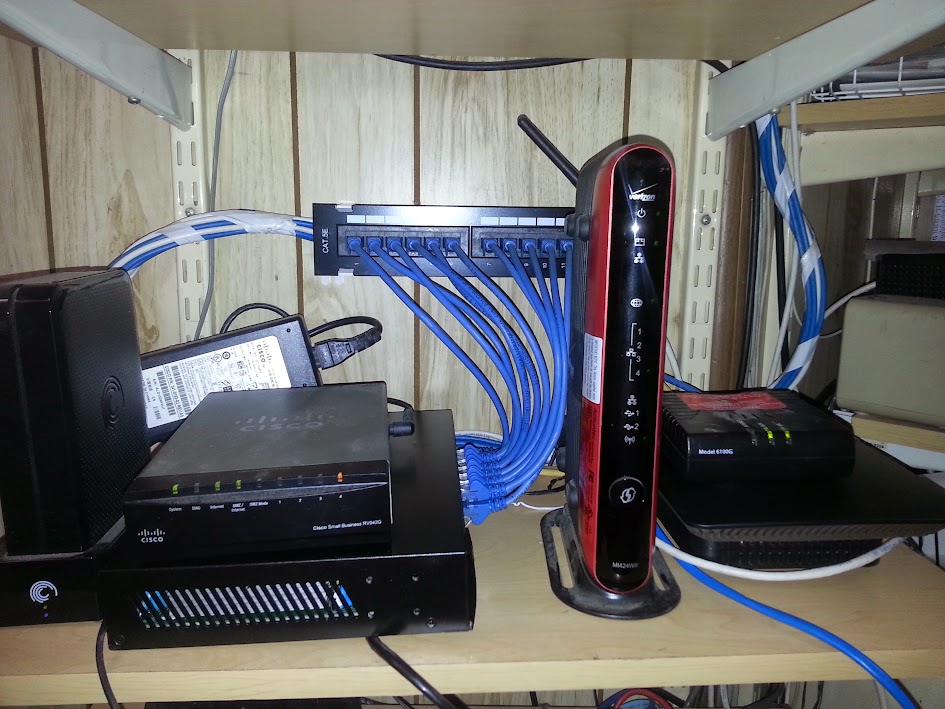
Now lets just hope whoever patches in the network equipment does a neat job with the patch cords, and mounting the router and switches.  

Wire run to one of the jack locations,
waiting to be snaked down the wall. 
Sorry for the blury image.
This was the only 2 labels I was able to make
before my label machine started smoking. 

All additional jacks were hand labeled with a marker.

The only "mistake" in the job,
on this jack only the voice is blue and data is white.
Both pass, so no need to stress out redoing the jacks.


6 CAT 5 runs - no drop ceiling, no damage to walls.

The people in the office always have a "small" or "quick" job for me.
This one was "3 short runs" and to install 3 VoIP phones. 

The problem: the rack is on the opposite side of the office, there are no drop ceilings, and the voice and data networks are physically isolated, meaning that 2 runs will need to be made to each desk not one. 

The good thing is that there is a pipe chase that runs along the center of the basement, with a grille at the bottom of it, the rack is directly next to this location on one side of the building, and the jacks all need to be installed on a wall directly next to the chase on the other side of the building. 

7 runs were pulled (one spare) thru the pipe chase - a small hole was made on the side of the chase by the rack, and a grille was temporarily removed on the opposite side. 

On the far end of the image in the center you can see the rack.
Straight down the middle of the room is the pipe chase. 
The wires were then able to be snaked down the side wall (not the wall behind the desks, because that is a solid wall) and brought out on the side of the desks.

Wiremold brings the wires across the wall behind the desks,
and everything is topped off with surface mount jacks. 

Most of the other jacks in this office were already wired this way (just none were installed on this side of the office yet) 

Physically isolating the Voice and Data IP networks is always the best option whenever possible. When it is not possible, then you can connect your voice and data routers to the switch. It is best to turn DHCP off on the phone network's router, and set your phones static IP to that network. But a good alternitive for a small business would be a multi WAN router with multiple internet connections, this can manage all data traffic so that it should use one internet connection, while sending the VoIP traffic on the other internet connection. This is optimal because in the event of a failure of one of the internet connections the failover will automatically move all network traffic over the same internet connection, reducing down time. Many small businesses will not even notice voice quality issues, or loss of data speeds with this set up. 

Sunday, June 9, 2013

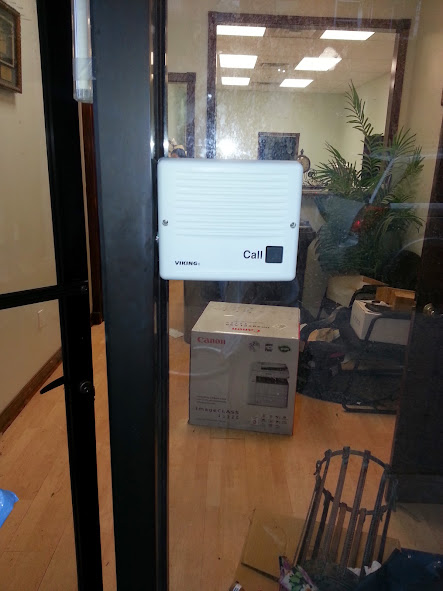
another doorphone (mounted on glass window)

Again it seems as if no one in this industry takes pride in their work, or takes the time to neaten up the wiring once eveything is working properly. The only other 2 excuses I could come up with are - "it's not my job" = someone un, or underqualified made this mess, OR it could do with money. Either the person who did this was not paid a decent wage, and therefore took the fast and easy way out of it, or the customer was too cheap to pay for it to be done the right way and only wanted to pay for it to work. 

I was here twice, both times at the end of the day, and the employees like to leave at the 5:00 whistle, so there was no time for me to get in there and clean this mess up, which would have probably taken 2 or 3 hours to get done.
Yet another mess from the previous wiring tech.

So my work gets done as neatly as possible with what I had to work with. My relay was mounted just above the old relay, and behind the DSL modem, which is being replaced with the cable modems shown mounted to the wall at the bottom of the picture above.
my RC2a "mounted" behind the DSL modem (being deactivated)
and just above the old door phone relay for the old PBX

The old doorphone was mounted sideways on the left side of the door frame, just next to the door, however the e20b would have stuck out way too far, and the roll down gate is nearly flush with the storefront, so I had to get a little creative with how and where to monut the door bell, which i screwed to the side of the window frame making it appear as it is floating on the window.

Getting creative with mounting the doorphone with limited space.